An Incident Owner is assigned by the Incident Screener and is responsible for assigning investigators and supervisors, and ensuring an assigned incident is complete before it's closed. All incidents assigned to the Incident Owner can be accessed from Incident Management > Incidents > Active Incidents, though they will also appear on the My Tasks page.
If assigned as an Incident Type Owner by an administrator, owners can create and read any incidents of that type without being directly assigned to it.
To view and edit assigned incidents:
Log into a user account from the Incident Owner user group.
Click the dropdown in the nav bar > Incident Management to display the Incidents activity.
 The nav bar.
Click an open incident to open the Incident Review form.
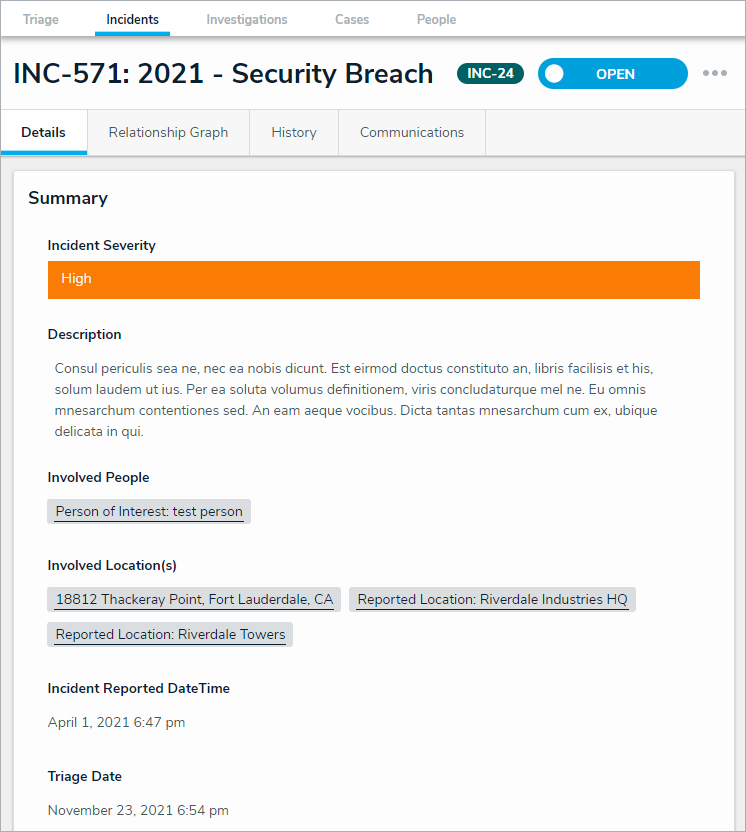 The Incident Details tab.
Optional: Click the History tab to view all changes made to the incident.
Optional: Click the incident name (e.g., INC-571: 2021 - Security Breach) to edit as required, then click away from the title to save your changes.
Click the following buttons to perform these actions, as required:
Tree: Display related incident details in a collapsible tree format.
Export: Export incident details into Excel format for use with third-party analytics tools.
Print: View an exportable incident detail report.
Click the Primary Incident Type, Additional Incident Type, and Business Unit fields, and begin typing keywords, then click to select the relevant option.
Clicking on an incident type or business unit once it's added will open a read-only form where users can review that incident type or business unit's details. Add or change the Incident Flags, Reporting Source, Severity, Incident Start and End DateTime, Fiscal Year, and/or Additional Responses by selecting the relevant option.
Optional: Enter the police report file number in the Police File Number field.
Type in the Description field to provide additional incident information, as required.
Click the + icon below Details to expand the section. Click a tab, then click + to add relevant incident details.
Click the + icon below Record Security and type the supervisors' name in the Incident Supervisor field to assign it to them. Complete the other section fields as required.
Click the + icon below Loss & Recovery, Links, Tasks & Action Plan, Investigation Summary, and Initial Observation. Complete the other section fields as required.
The Loss & Recovery section will only appear for certain incident types. 
The information in the Initital Observation section can be translated by clicking the  icon and selecting Create [Language] Translation.
To revert a specific field back to its original language, click the icon next to the desired field.
Optional: Type the relevant name in the Investigator field to assign them to the incident.
Optional: Enter comments (tagging other users if needed), in the Comments text box (at the bottom of the page). Read more here: Incident Form Comments.
Click one of the following buttons to save the incident:
Open Investigation: Send the incident to the Incident Investigator for review.
Return to Triage: Send the incident to the Incident Screener for further action or review.
Close Incident: Close the incident because no further action is required.


 icon and selecting Create [Language] Translation.
 icon next to the desired field.
 | Note: An incident cannot be closed if it contains any open or overdue tasks. |