Overview
A report parameter controls the data displayed in a report and all its elements. Parameters cannot be applied until one or more report elements have been added to the Report Canvas, as parameters rely on the data series selected in the element(s).
User Account Requirements
The user account used to log into Resolver must have Administrator permission to configure or apply parameters to reports.
Related Information/Setup
Please review the Report Elements section for more information on report elements.
Please review the Focuses & Data Series article for more information on report focuses and data series.
Please refer to the Date & Time Field article for further information on the Date & Time field.
Navigation
- From the Home screen, click the Administration icon.
![]()
Administration Icon
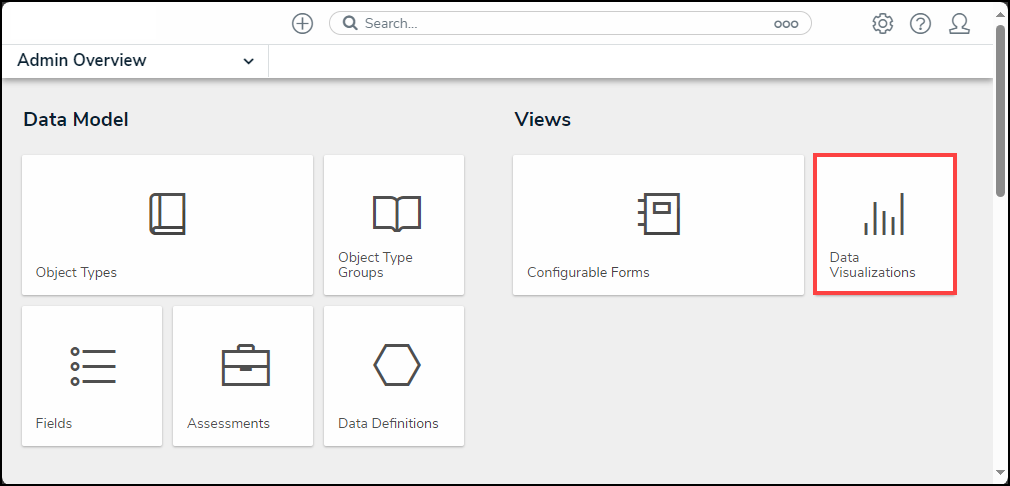
- From the Admin: Overview screen, click the Data Visualizations tile under the Views section.
Data Visualizations Tile
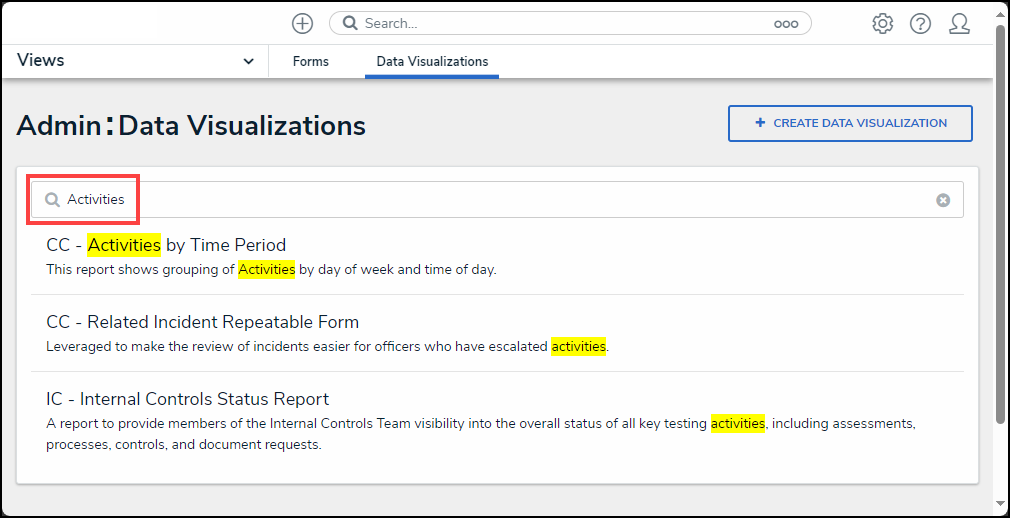
- From the Admin: Data Visualizations screen, enter a report name in the Search field to narrow the search results.
Search Field
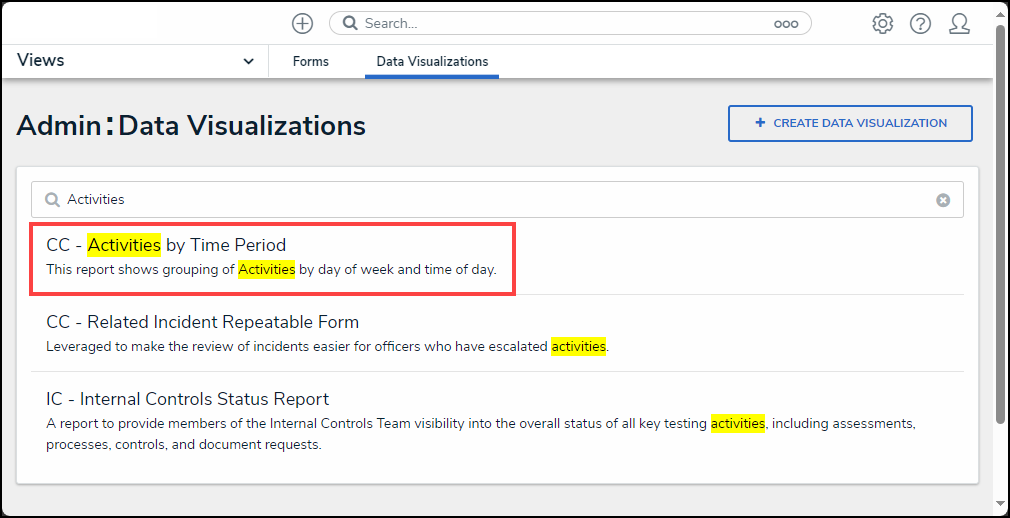
- Click on a Report link.
Report Link
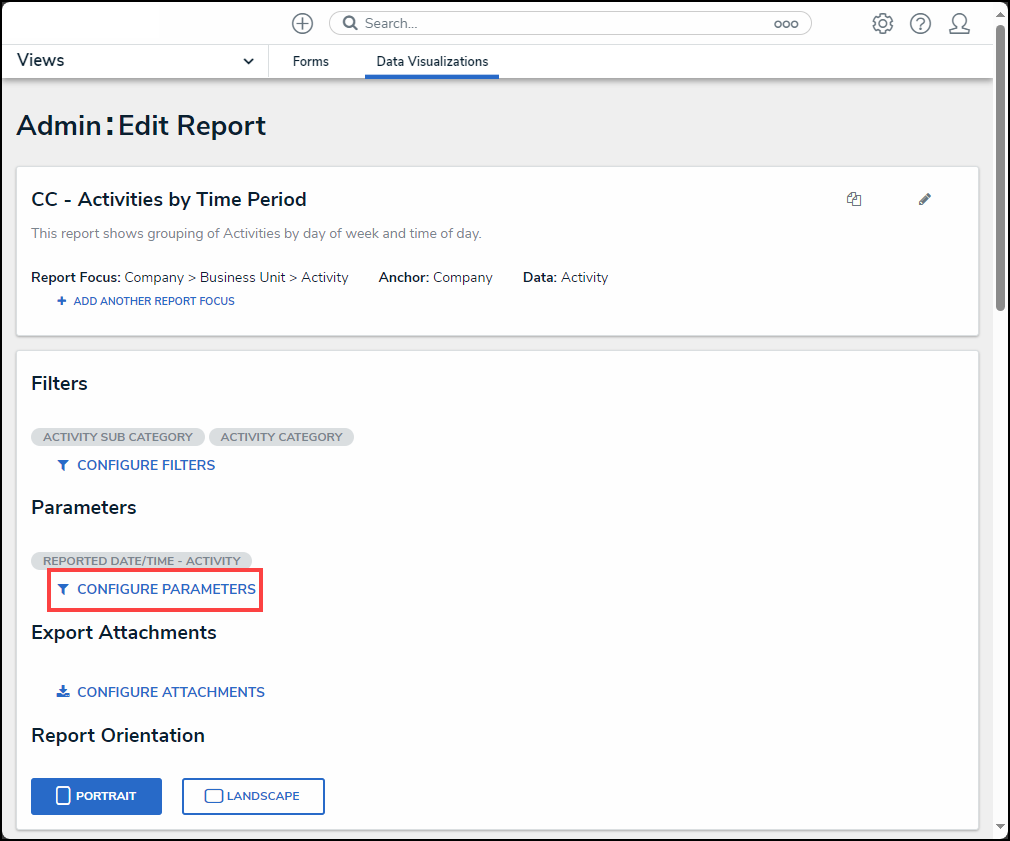
- From the Admin: Edit Report screen, click the Configure Parameters link under the Parameters section.
Configure Parameters Link
Adding Parameters to a Report
Report parameters differ from report filters as they include objects with specified parameter field values or blank values. While filters exclude objects that do not have a specific value. For Example, if an object has no value filled in for the selected field, it will appear in the report when that field is used as a parameter, but not when that field is used as a filter.
- From the Configure Parameters pop-up, select a data series option from the Select Data Series dropdown menu. The option selected will determine the options available on the Configure Parameters pop-up.
 Tip:
Tip:
In order for options to appear in the Select Data Series dropdown menu, at least one report element must be added to the report canvas. Please refer to the Report Elements section for further information.
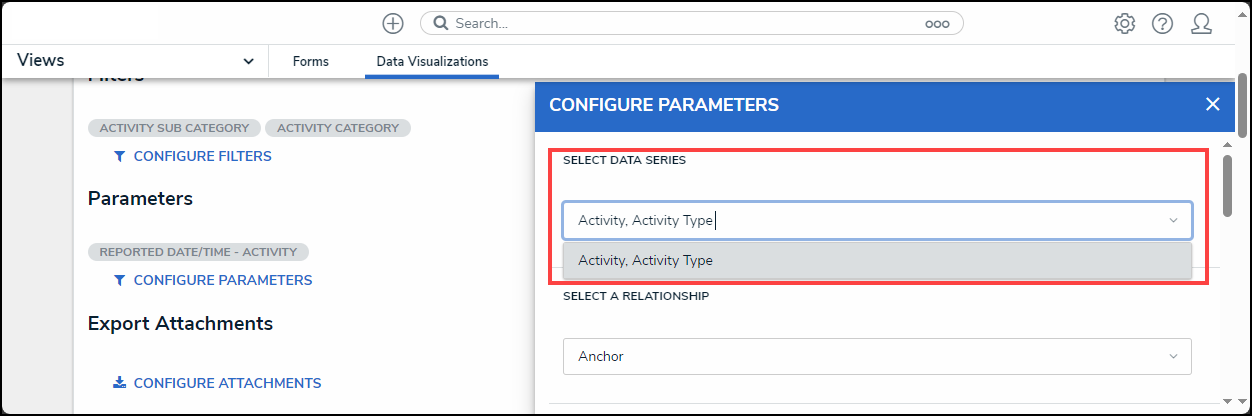
Select Data Series Dropdown Menu
- Select a relationship type from the Select a Relationship dropdown menu:
- Anchor (Report Focus)
- Relationship
- Reference
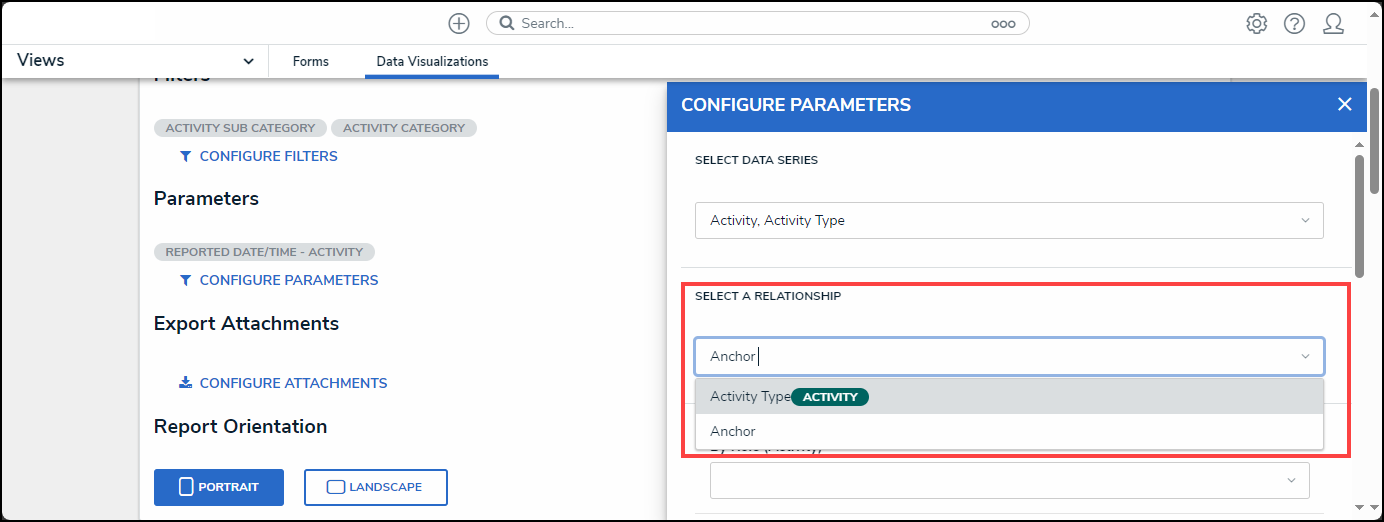
Select a Relationship Dropdown Menu
- Select roles from the By Role (Object Type Name) dropdown menu, only users in the roles selected can view the report and its elements.

By Role Dropdown Menu
- Click on the x icon next to the role value to delete the role from the By Role (Object Type Name) field.
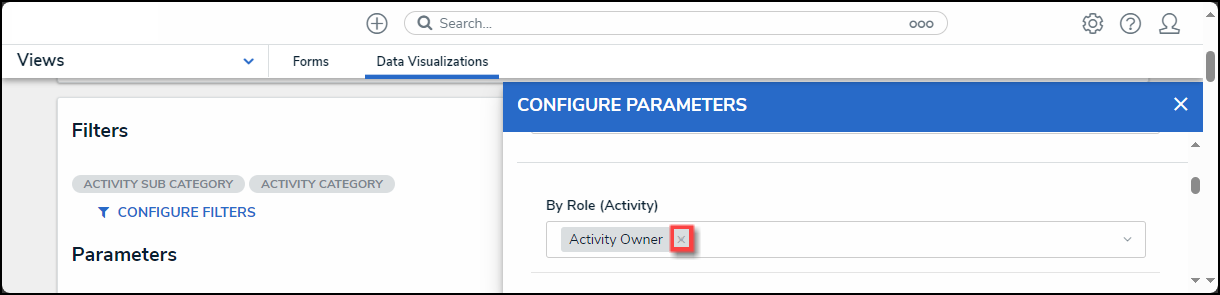
x icon
- Select a data range to filter the report data based on values in the Data & Time fields (By Assigned, By Cleared, By Closed, By Expired Date, or By Reported) , by selecting a range option from the By (Object Date Field) dropdown menu.
- Today: This option shows data from today's date.
- Last (x) Days: This option shows data from the last 30, 60, 90, or 180 days, starting from today's date.
- Custom: This option allows a user to provide a date range, selecting a From and To date from the Calendar pop-up for the corresponding fields.
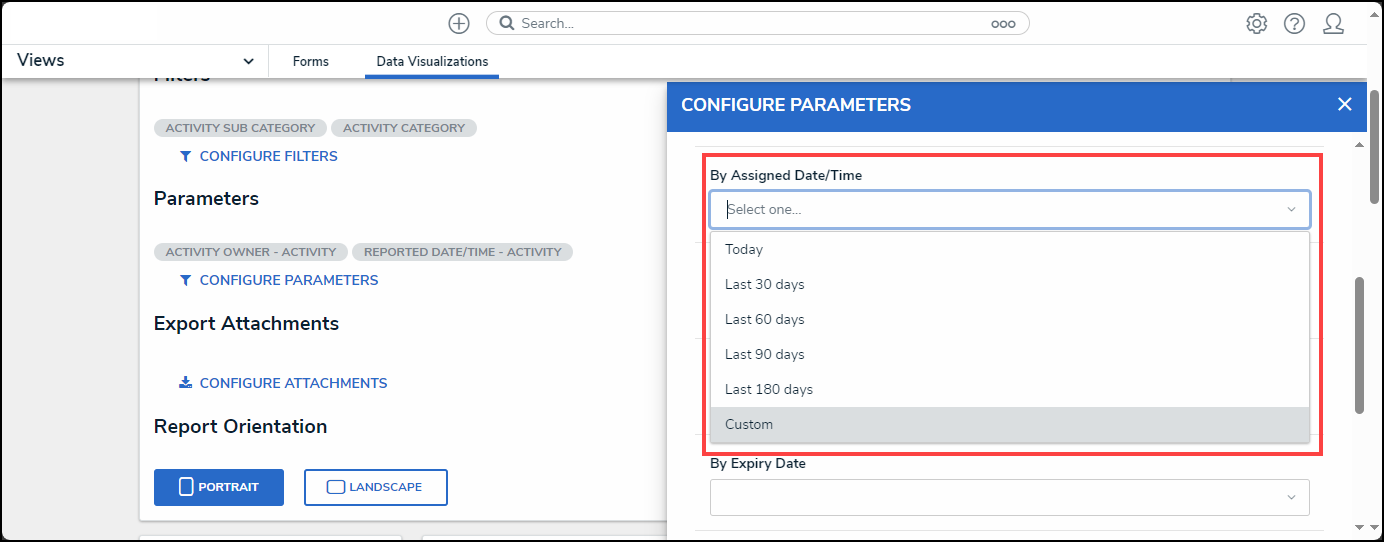
By (Object Date Field)
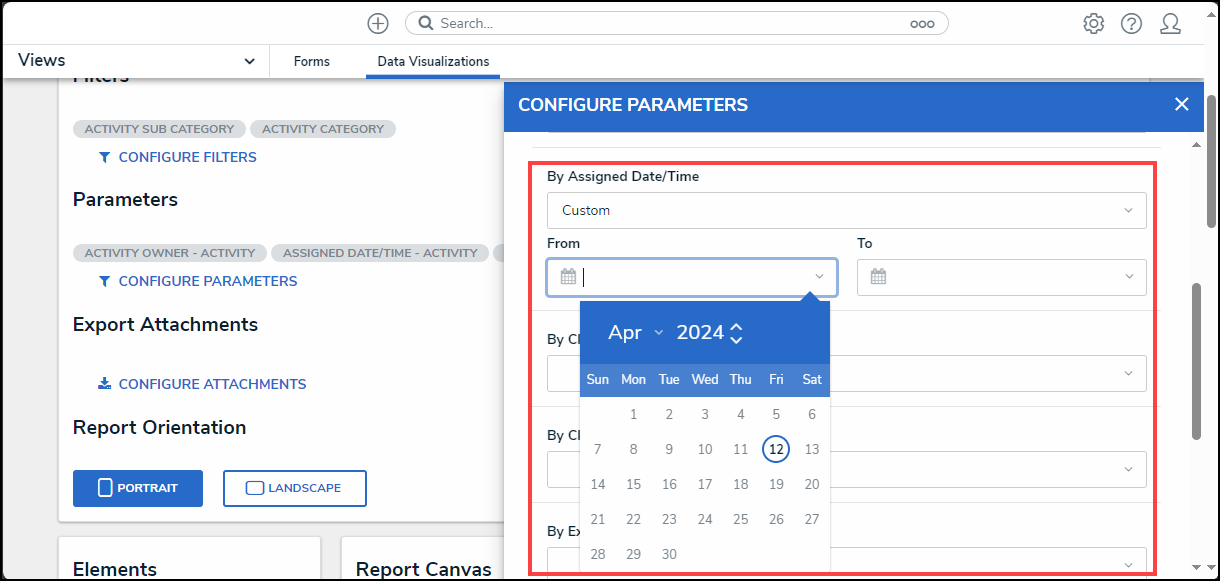
Custom Date Range
Tip:
Please refer to the Date & Time Field article for further information on the Date & Time field.
- Select a range used to filter the data by creation date from the By Created On dropdown menu.
- Today: This option shows data from today's date.
- Last (x) Days: This option shows data from the last 30, 60, 90, or 180 days, starting from today's date.
- Custom: This option allows a user to provide a date range, selecting a From and To date from the Calendar pop-up for the corresponding fields.
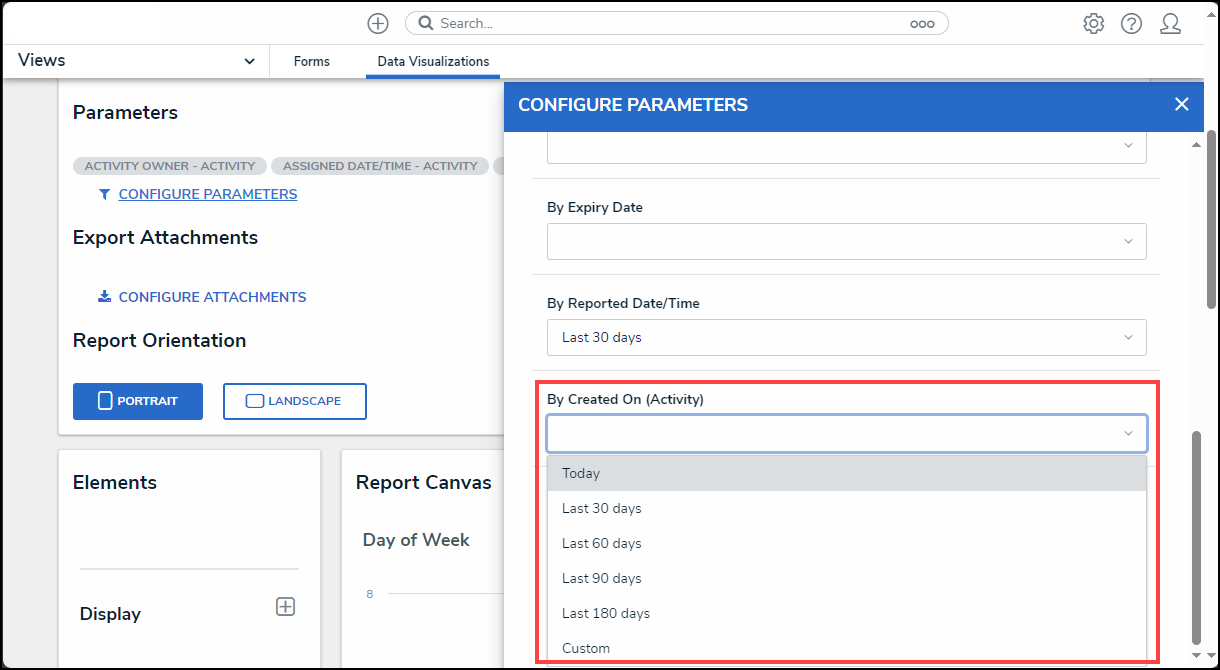
By Created On Dropdown Menu
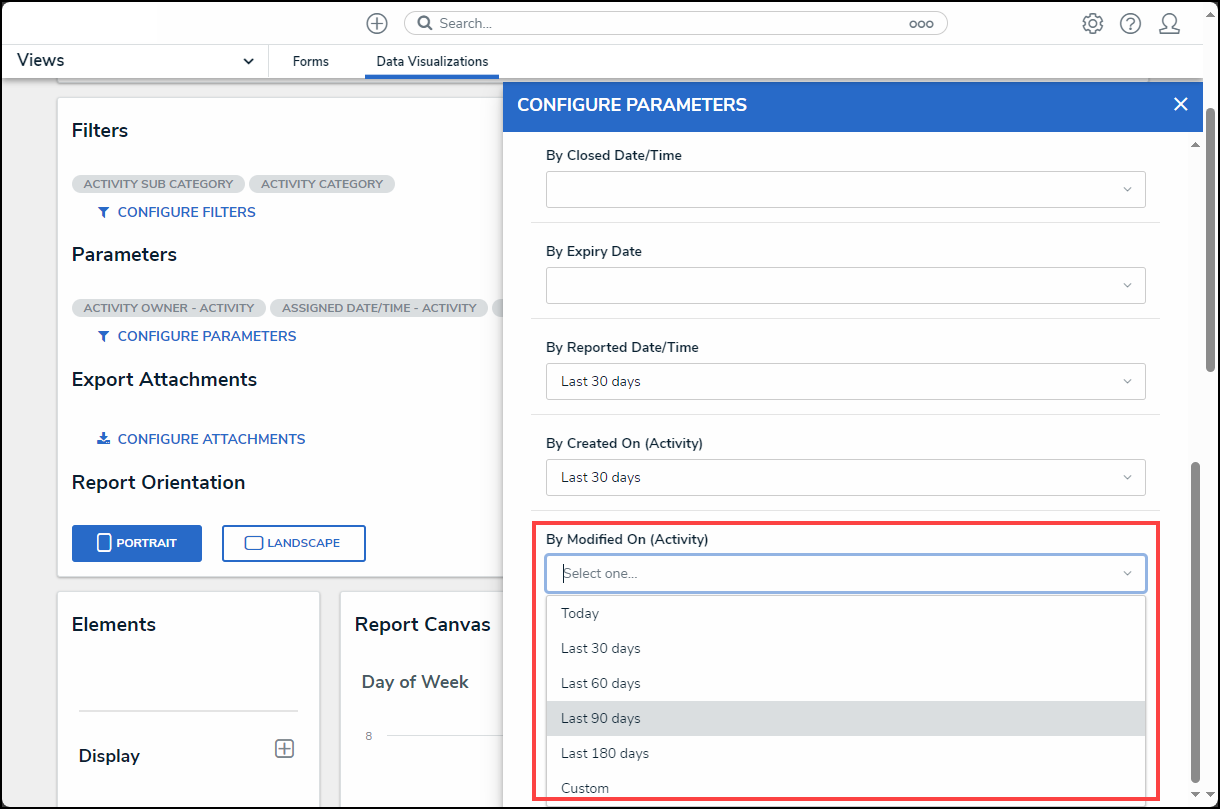
- Select a range used to filter the data by modified date from the By Modified On dropdown menu.
- Today: This option shows data from today's date.
- Last (x) Days: This option shows data from the last 30, 60, 90, or 180 days, starting from today's date.
- Custom: This option allows a user to provide a date range, selecting a From and To date from the Calendar pop-up for the corresponding fields.
By Modified On Dropdown Menu
- Place the cursor in a Date & Time, By Created On, or By Modified On fields and use the Backspace key or Delete key on a Keyboard to remove a date parameter.
- Click the x in the top righthand corner of the Configure Parameters pop-up to apply changes and exit the pop-up.