Overview
These instructions are for accessing Incidents in the Triage state from the Incident Management application.
 Note:
Note:
Members of the Incident Screener User Group can also view and open Incidents on the My Task list on the Home screen.
User Account Requirements
The user account you use to log into Resolver must be part of the Incident Screener User Group.
Related Information/Setup
You also need to ensure that the user you are using to log into Resolver is part of the Incident Screener User Group. Please follow the link below for instructions on Creating a User Group and Adding a User to a User Group:
Users can add and reply to comments on incidents and most related objects depending on their User Group and account permissions. Please refer to the Incident Form Comments Overview article for more information.
For more information regarding the options available for the Form Header, please refer to the Form Header Overview article.
Navigation
- From the Resolver Home screen, click the Home dropdown and select the Incident Management link.

Incident Management Link
- From the Triage screen, click an Incident Name from the Submissions section.

Submissions Section
Triage an Incident
When an Incident is submitted through the Confidential Portal, Incident Screeners will receive an email notification with a direct link to the Triage form.
- The Incident Form screen will appear.
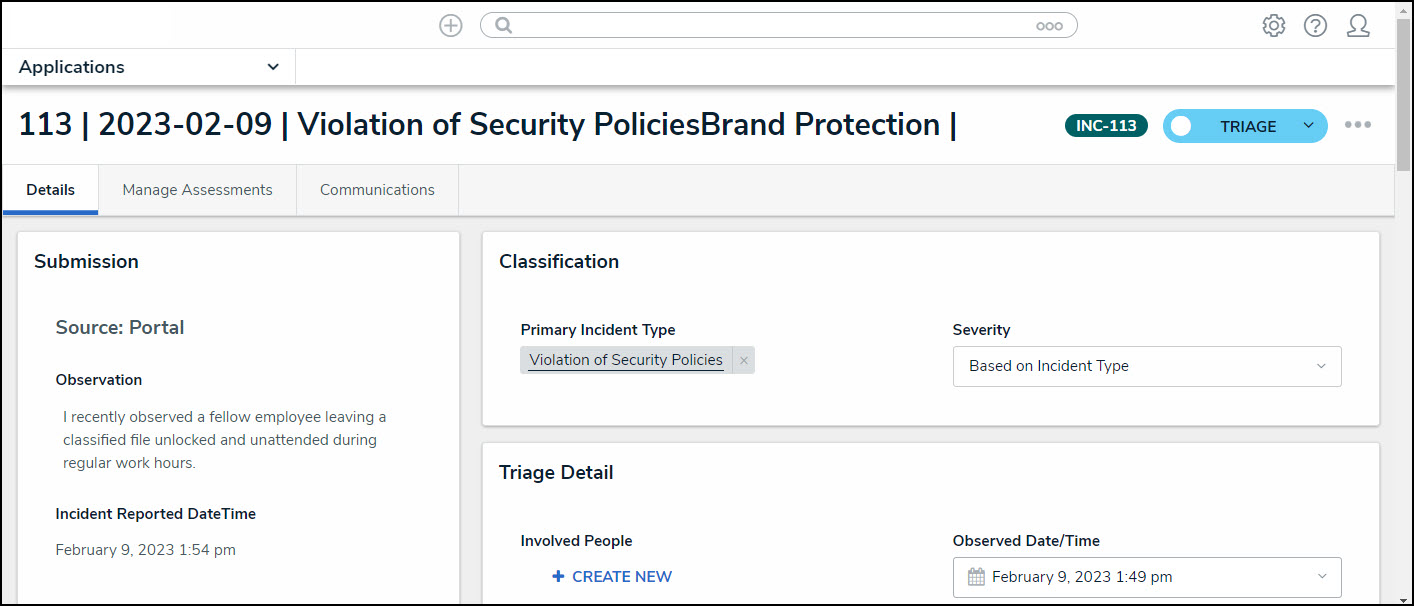
Incident Form Screen
- (Optional) Click the Incident Form Header to edit the Incident Form Name. After editing the Incident Form Name click outside the field to save your changes.
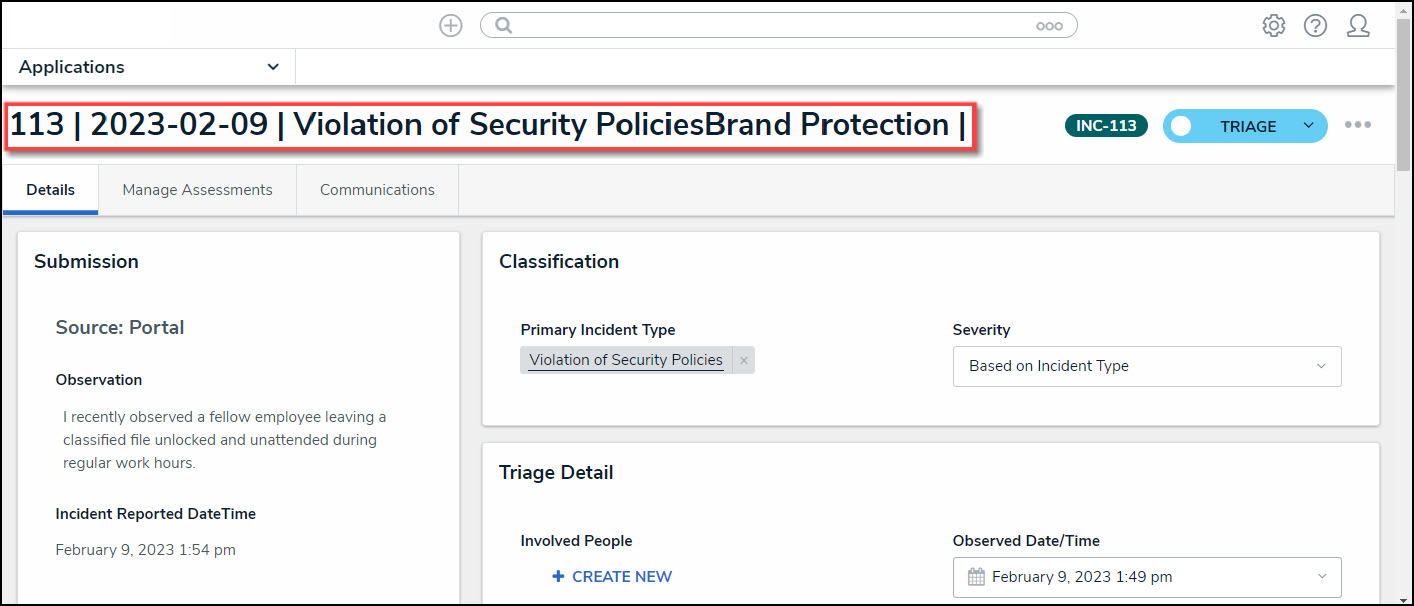
Incident Form Header
- (Optional) Click the Delete icon next to the Primary Incident Type field to choose a different Incident Type (e.g., change the Incident Type selected by the Submitter).
 Note:
Note:
The Primary Incident Type dictates which fields will appear on the Incident Form screen.
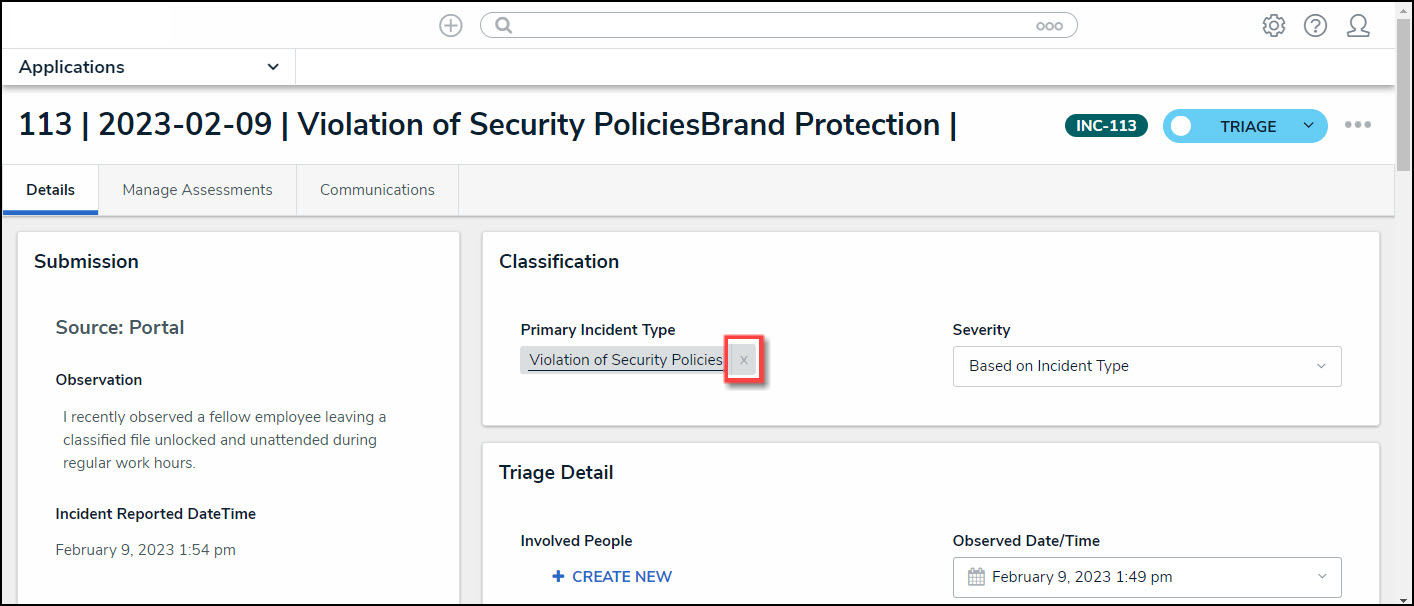
Delete Icon
- The Add Existing Primary Incident Type link will appear.
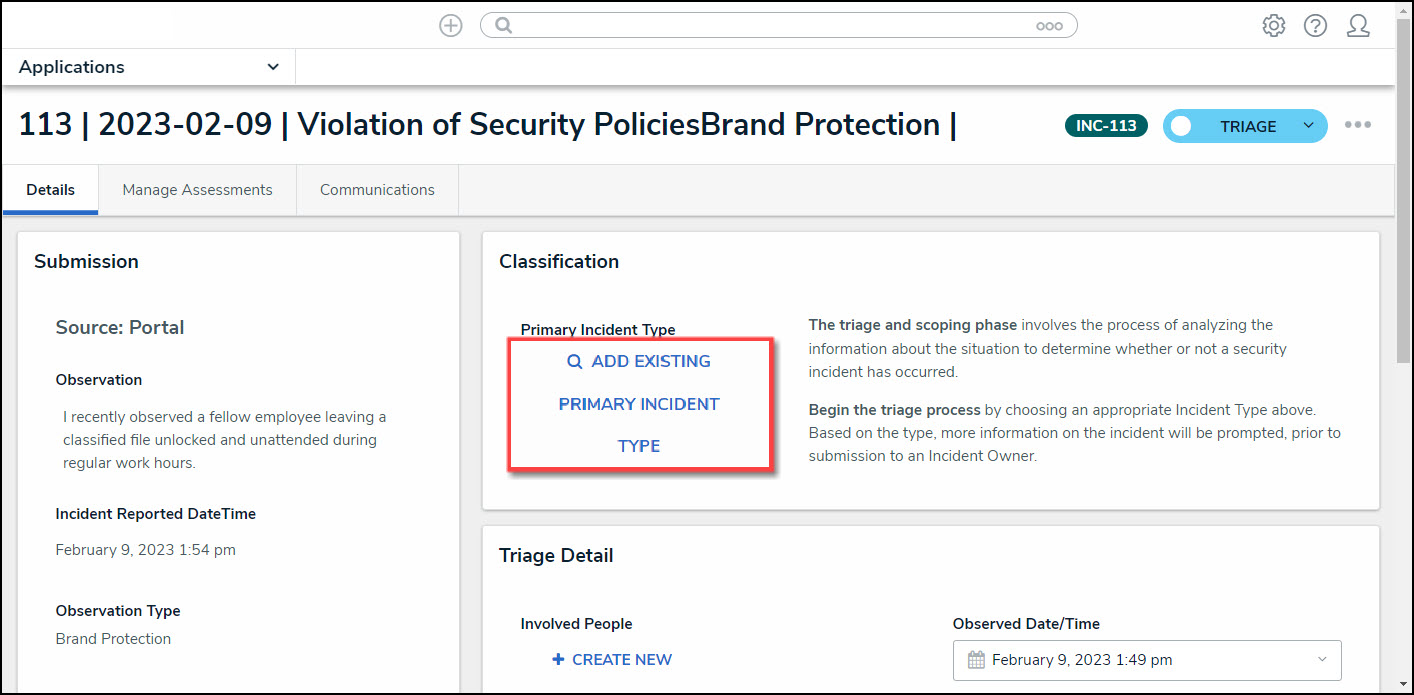
Add Existing Primary Incident Type Link
- Click the Add Existing Primary Incident Type link.
- From the Add Existing Primary Incident Type pop-up, select an Incident Type from the 50 most recently created Incident Type list by clicking the +Add link or enter an Incident Type Name in the Search field to search for an Incident Type that is not listed.
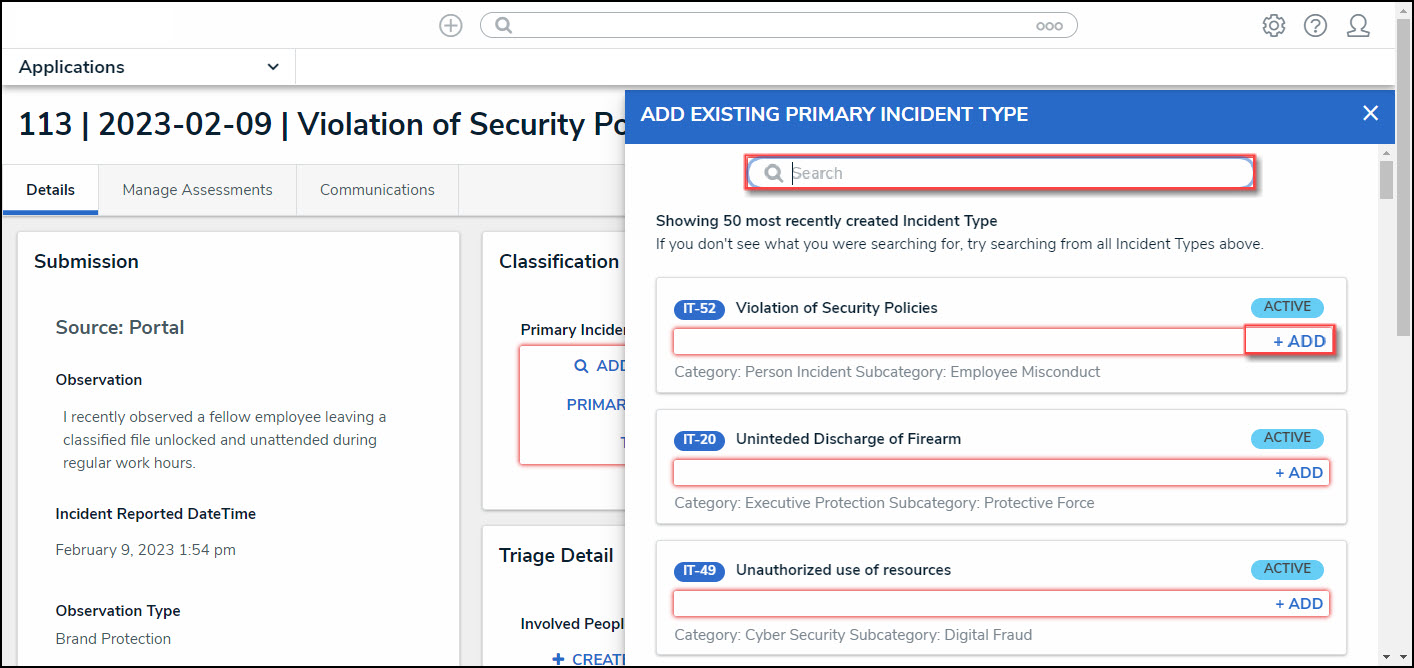
Add Existing Primary Incident Type Pop-up
- (Optional) Edit the Incident's severity score by selecting a severity type from the Severity dropdown menu.
- Based on Incident Type: The Based on Incident Type will automatically set the severity level to one of the types (Low, Medium, etc.) based on the severity of the Primary Incident Type.
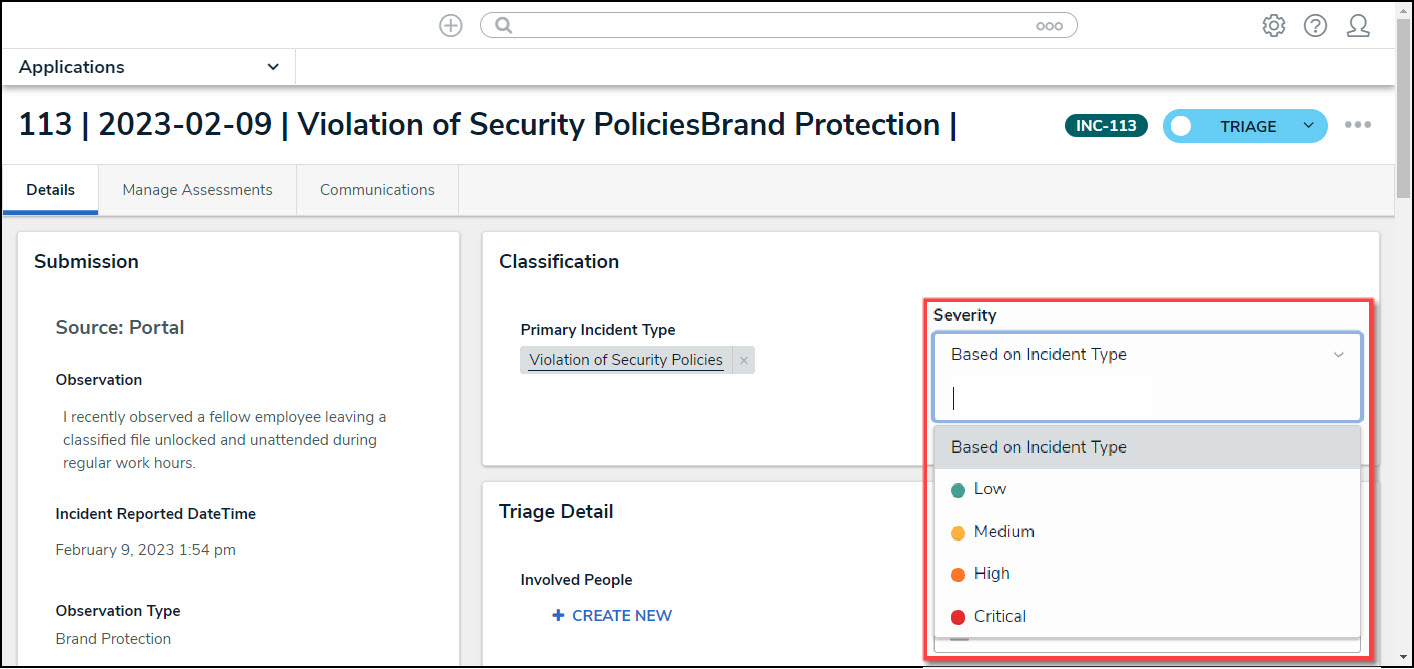
Severity Dropdown Menu
- From the Triage Details section, the following details can be added:
Involved People
- Click the + Create New link to add a new Involved Person to the Incident details.
- From the Create a New Involved Person pop-up, you can add the following information:
- Person Involvement Type: Select how the person is involved with the Incident from the Person Involvement Type dropdown menu. The Linked POI field will appear if you select Suspect or Person of Interest.
- Linked Person: Enter the name of the person involved in the Linked Person field and select the person or persons from the dropdown menu. If the person involved is not already in the system, click the + button to add the person.
- If not linked, name the involvement: Enter the name of the person involved if the person does not exist in the system and the user does not want to be added to the system.
- Linked POI: The Linked POI (Point of Interest) field appears when Suspect or Person of Interest is selected in the Person Involvement Type field. Click the + button to add a personal description (e.g., height, weight, eye color, etc.) of the person of interest.
- Description: Add further details about the person of interest in the Description text box.
- Click the Create button to add the person of interest to the Incident.

Create a New Involved Person Pop-up
Involved Location
- Click the + Create New link to add a new Involved Location to the Incident details.
- From the Add a New Involved Location pop-up, you can add the following information:
- Copy: The Copy button will copy the location details from the Incident Submission form.
- Location Reason: Select how the location is involved with the Incident from the Location Reason dropdown menu.
- Primary Location: Indicate whether the location is the primary location for the Incident by selecting either the No or Yes toggle switches.
- Add Existing Location: Click the Add Existing Location link to select a location already in the system. The Add Existing Location pop-up will appear, allowing you to select an existing location by clicking the +Add link or searching for a location that is not on the list by entering the location's name in the Search field.
- Address or Map Location: Enter the address or map coordinates (longitude and latitude) of the location involved in the Address or Map Location field to pinpoint the location on the map.
- Create: Click the Create button to create the new involved location and add it to the Incident.

Add A New Involved Location Pop-up
Involved Organization
- Click the + Create New link to add a new Involved Organization to the Incident details.
- From the Create a New Involved Organization pop-up, you can add the following information:
- Organization Involvement Reason: Select how the Organization is involved with the Incident from the Location Reason dropdown menu.
- Linked Organization: Enter the name of an Organization in the Linked Organization field and select an organization from the dropdown menu or click the + button to add a detailed description (e.g., image, organization name, etc.) of the Organization.
- If not linked, name the involvement: Enter the name of the Organization involved if the Organization does not exist in the system and the Organization does not want to be added to the system.
- Organization Flags: Enter the name of an Organization flag in the Organization Flags field and select a flag from the dropdown menu. Organization Flags help to organize Incidents and can be used for reporting purposes.
- Description: Add further details about the Organization in the Description text box.
- Create: Click the Create button to create the new Organization and add it to the Incident.

Create a New Involved Organization Pop-up
Business Unit
- Click the + Create New link to add a new Business Unit to the Incident details.
- From the Add Existing Business Unit pop-up, you can add the following information:
- The Add Existing Business Unit pop-up will appear, allowing you to select an existing Business Unit by clicking the +Add link or searching for a Business Unit that is not on the list by entering the Business Unit's name in the Search field.

Add Existing Business Unit Pop-up
- From the Triage Details section, the following fields can be edited:
- Observed Date/Time: The Observed Date/Time records when the Incident occurred. Select the Observed Date/Time field and select a Date from the Calendar pop-up and a Time from the Time section using the increase and decrease arrows to choose the correct time.
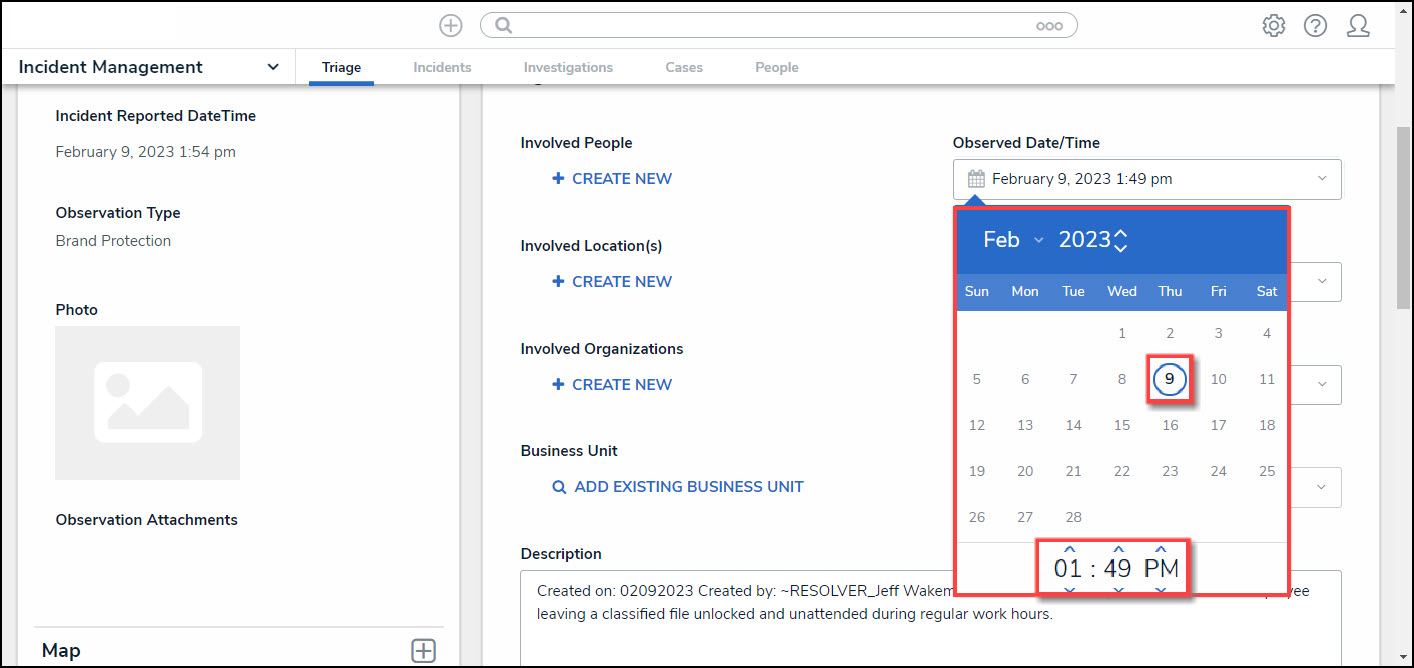
Calendar Pop-up
- Incident Start Date/Time: The Incident Start Date/Time records when the Incident began. Select the Incident Start Date/Time field and select a Date from the Calendar pop-up and a Time from the Time section using the increase and decrease arrows to choose the correct time.
- Incident End Date/Time: The Incident End Date/Time records when the Incident ended. Select the Incident End Date/Time field and select a Date from the Calendar pop-up and a Time from the Time section using the increase and decrease arrows to choose the correct time.
- Incident Flags: An Incident Flag adds another level of detail to the Incident (e.g., Injury Occurred, Employee Involved, etc.). You can add multiple Incident Flags to an Incident by selecting Incident Flags from the Incident Flag dropdown menu.
- (Optional) Click the Description text box to edit the Incident description. The system will automatically fill out the Description text box with the Create on - date, Created by - Submitter Name (if not Confidential), and Observation information.
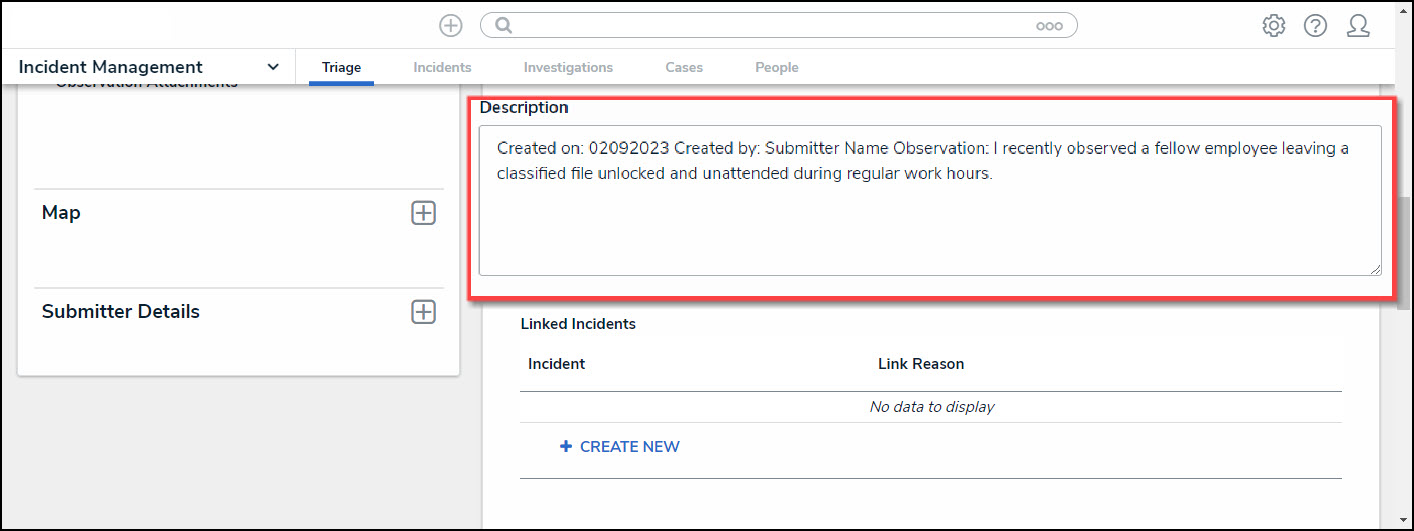
Description Text Box
- From the Linked Incidents section, the following details can be added:
- Incident: The Incident field lists the incident number and name. Click on the Incident to open the Incident Link pop-up to edit the Incident Reason field.
- Link Reason: Select a reason to link the Incidents from the Link Reason dropdown menu.
- + Create New: Click the + Create New button to open the Create a New Incident Link pop-up to create a link between an existing Incident and the new Incident by selecting a Link Reason and Incident.

Linked Incidents Section
- Enter any additional information or instructions in the Triage Notes text box.
- From the Ownership & Access section, the following fields can be edited:
- Incident Owner: Enter the Name of an Incident Owner or User Group in the Incident Owner field and select an Incident Owner from the dropdown menu. An Incident Owner creates and edits their assigned Incident Objects and related Relationship Objects. The user(s) will receive an email notification when assigned an Incident.
- Additional Access: Enter the Name of a User or User Group in the Incident Owner field and select an Incident Owner from the dropdown menu. Defines additional users or groups who may need to access the Incident.
- Security Officer: Enter the Name of a Security Officer or User Group in the Incident Owner field and select an Incident Owner from the dropdown menu. A Security Officer creates, monitors and updates Incidents with officer-specific functionalities (e.g., limited workflow and details).
- Incident Supervisor: Enter the Name of an Incident Supervisor or User Group in the Incident Owner field and select an Incident Owner from the dropdown menu. An Incident Supervisor manages the Incident Objects in an Archive or Review state.
- Investigator: Enter the Name of an Investigator or User Group in the Incident Owner field and select an Incident Owner from the dropdown menu. An Investigator will document Incident investigations.
- Incident Contributor: Enter the Name of an Incident Contributor or User Group in the Incident Owner field and select an Incident Owner from the dropdown menu. An Incident Contributor contributes data to existing incidents (e.g., being assigned tasks, adding attachments).
- Incident Approver: Enter the Name of an Incident Approver or User Group in the Incident Owner field and select an Incident Owner from the dropdown menu. An Incident Approver advances the workflow of a particular incident, providing reviews and approvals, and gets assigned specific tasks.

Ownership & Access Section
- (Optional) Depending on user permissions, click the Communications tab on the Incident Form screen.
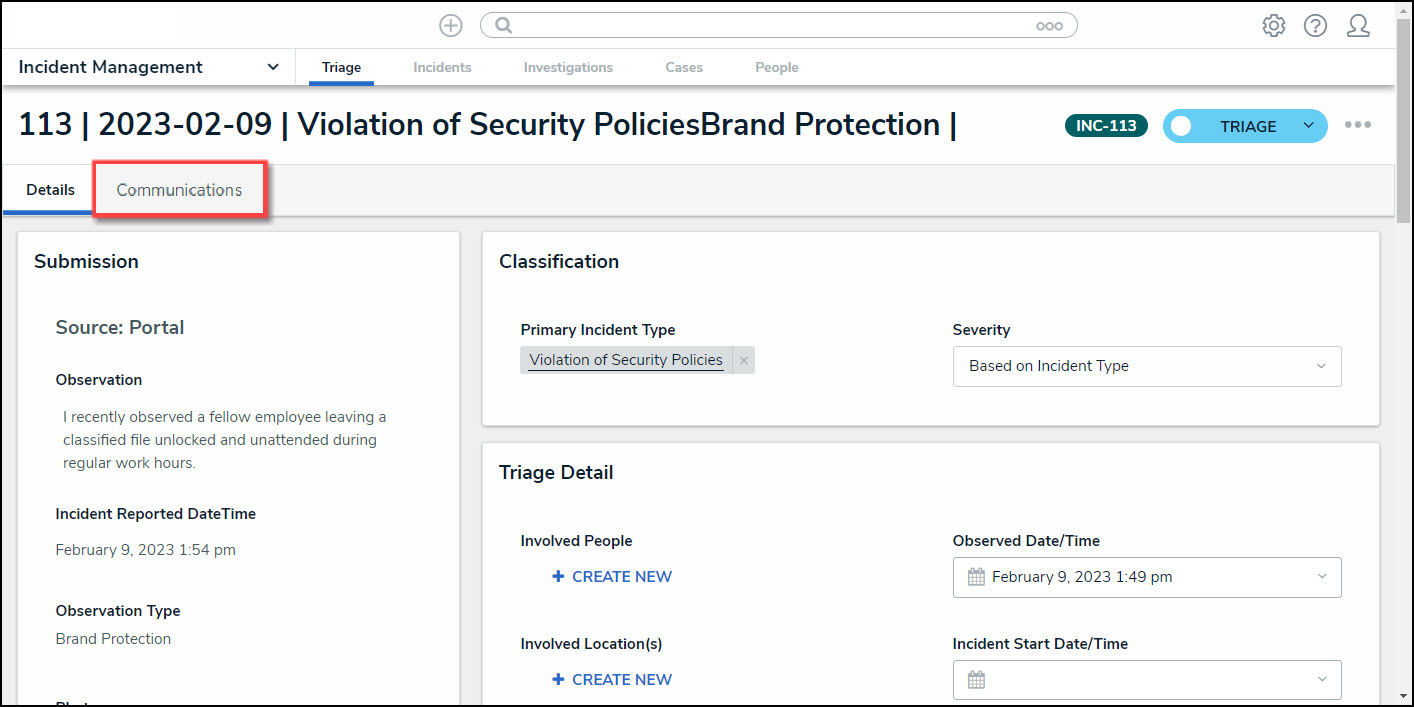
Communications Tab
- From the Communications screen, enter additional comments or tag users/resources in the Comments text box.
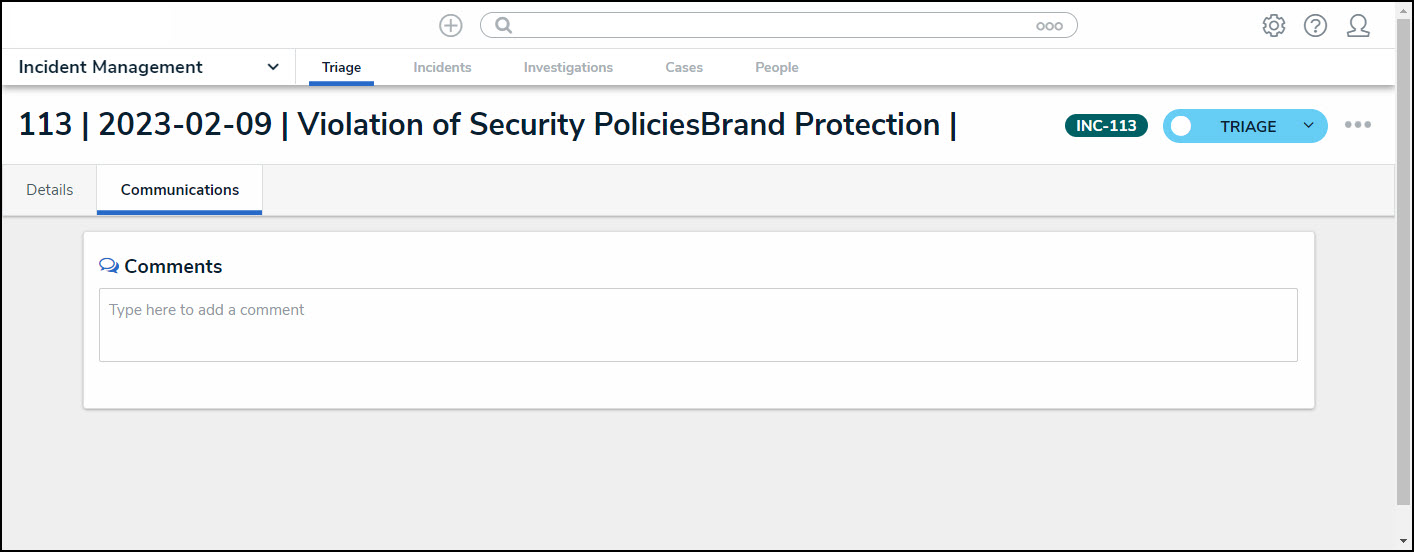
Communications Screen
- Click the Details tab to get back to the Incident Form screen.
- From the Incident Form screen, click one of the following buttons to complete the Incident Triage:
- Close: The Close button will transition the Incident into the close stage if no further actions are required.
- Return: The Return button will send the Incident back to the Submitter if additional information is required.
- Mark As Open: The Mark As Open button sends the incident to the Users or User Group in the Incident Owner field if further action is required.